

Mod #1 - Too many tools required to assemble the track. I replaced the phillips head screws, that secure the crossbars to the track legs, with wing screws. This eliminates the need for a screwdriver. I believe that I found these at Ace Hardware.
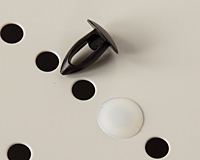
Mod #2 - Still, there were too many tools required to assemble the track. I replaced the lock nuts that secure the start gate with wingnuts. You hold the start gate in place, align a wingnut under the track mounting hole and then put the screw in. A wing of the wingnut will hit the back of the start gate as you tighten the screw with a hex wrench. This eliminates the need for a socket or crescent wrench.
See post #5 below for how to use a self-clinching nut to make mounting the start gate even easier.
With these two mods, you now only need a 5/32" hex wrench for setup and tear down.
Mod #3 - Joining the first two sections can be a pain, since the sections must be on their sides and floors can be uneven. Being on their sides makes it harder to correct any lane misalignment between sections. This mod allows you to join the first two track sections with them being flat to the floor.
Here’s basically what I did to the start section:
- The front legs and the joining bracket that is just uphill from it were swapped. The front legs now fold back towards the rear legs.
- The crossbars that attach to the legs had to be modified, as the legs are now a bit closer together. These were modified on the rear leg end of the crossbars with my jig saw and a metal cutting blade. With the front legs turned around (folding towards the rear legs instead of away), I did have to elongate the holes on the front end of the crossbars, as the holes did not quite line up.

Now, both sections can be secured together while they are flat to the floor. With the front legs folded back and the start section flat to the floor, the joiner plate can be slid under the end easily. The next section can then be quickly set in place and everything secured together. If any of the lanes are not perfectly in alignment, from section to section, those can be easily tweaked.
At this point, the two joined sections are put on their side, with the track legs extended out to keep them on their side. Now one of the crossbars can be attached. The first two sections can then be stood up and the 2nd crossbar attached.
With the front legs moved back a bit, I was concerned that they would not sit down on the floor, even when the weights were added. That ended up not being an issue. The new front leg position does increase the slope of the start section a bit. I guess that you can consider that giving all the cars a little extra speed boost.
I ran a race on Wednesday with the track in this new configuration and it was definitely easier to setup.
I have passed on this information to Micro Wizard, in the hopes that they implement these easy changes to make setup easier on their customers.
Below are some more mods that I implemented.
Mod #4 - The foam strip to cushion the snapping open of the gate doesn't do a very good job of that. That vibration can actually affect the running of the cars. So, I thought of trying to use some memory foam, as it doesn't bounce back quickly like regular foam. I first tried memory foam shoe insoles, but they ended up being too stiff. After seeing bracketracer use a memory foam ear plug to dampen the shock of a solenoid, I thought that I would give them a try. They certainly do make the opening of the gate more gentle. Removing the old foam was made easier by using a heat gun and a putty knife. The ear plugs are adhered with some double stick tape.

Mod #5 - The trip lever should be easier to operate. Long ago, I ditched the rubber piece that goes on the end of the lever, as it just seemed to drag along the metal of the gate. Metal on metal rubbing still wasn't an ideal situation either. So, I found a nylon peg and mounted it into the end of the lever. Now, the lever moves smoothly along the underside of the gate. The one I used was a stem bumper glide from Rockler. I saw something similar at Ace hardware, called an arrow clip that would also work.

Mod #6 and #7 - There are times when I get the kids to start the heats, but I wanted to make it easier for them to operate the gate. So, I added a handle to the end of the trip lever. Rockler does have a shorter handle, but I thought that I'd try the longer one out. The other issue is that often the kids would pull the lever instead of pushing it. While you can trip the gate that way, it really isn't the easiest way to do so. So, I put a stop on the gate to prevent moving the lever the wrong way. It is just a screw with a couple of nuts.


Mod #8 - Improve the stop section. Pretty soon after Micro Wizard bought the track company from Piantedosi they got hit with a patent infringement lawsuit on the stop section design. Piantedosi was the one that had designed that stop section. Well, I guess to settle lawsuit, Micro Wizard did a bit of a design change to make it more of a ramp style stop section. Unfortunately, the current design can have issues with cars that have low hanging weights. Weights can hit the front edge of the tab or even the front edge of the foam stop tape. I have seen cars pop up when they hit that. I am fortunate to have the original style stop section and it doesn't have that issue. Well, you can modify the current stop section to be like the original.
Here's what you need to do:
- Move the lane joiner plate at the end of the finish section a few inches closer to the finish line. That means drilling holes in the center of each lane. Though, I would start out with a smaller drill bit before finishing with the larger bit.
- Cut back the "fingers" on the front of the stop section to make new securing tabs. Drill a hole in the end of each securing tab. The tabs should fit between the lane guides and attach where the lane joiner plate was originally positioned at the end of the track.
- Order a new lane joiner plate from Micro Wizard so you can secure the stop section to the track. The stop section gets put in place on the end of the track, with the tabs sitting between the lane guides. Slide the joiner plate under the end of the track. Then line up the holes and add screws to secure the stop section.

Mod #9 - Adding a solenoid start gate can help reduce vibration from the start and make starts more consistent. There are commercial solenoid gate triggers available, like the one below which is part of a combo light tree and solenoid gate from Micro Wizard, or there is a DIY solution.


