It was relatively easy to make and our cost was less than $15 (about 1/3 the cost of the commercial gauge when it was widely sold, but is now hard to find). If you don't have a conventional set up to measure lateral run-out, you and your child can use this gauge to quickly and easily check for bad, out-of-round wheels. This is the same type of gage we used measure the runout of several populations of BSA wheels by mold number.
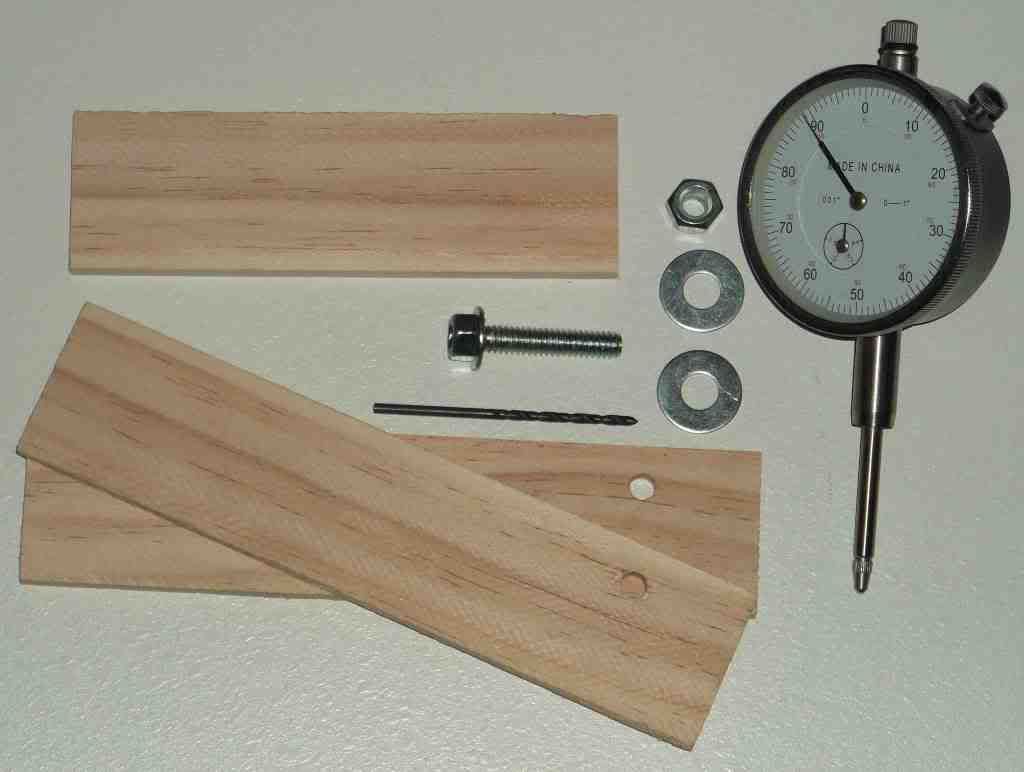
These are the parts needed to make one exactly like the photo:
- * (1) dial indicator with a 1/4"-wide lug back (Harbor Freight indicators we have are this width)
* (1) 1/4" - 20 bolt x 1-1/4" (Note: This is a less-common length)
* (1) 1/4" lock nut (Note: a lock washer and regular nut should also work)
* (2) 1/4" flat washers
* (1) 3/32" drill bit (preferably new) (Update: A #41 drill bit is probably better.)
* (1) 1/4"-thick large paint stirrer / paddle (free from the Home Depot)
To assemble (also note an updated design below):
- 1. Cut the large paint stirrer into 3 pieces: 4-3/4" (x 1), 6-1/4" (x 2).
2. Clamp the two long pieces together. Drill (through both pieces) a 17/64" diameter hole located 11/32" from the long edge and 1" from the short end (see photo). The short edge closest to the holes will be the top edge of the tool. The holes will secure the dial indicator through its lug back.
3. Spread a very thin layer of wood glue on both sides of the short piece and sandwich it between the two drilled pieces, keeping the bottom edges and long edges aligned. Slide the shank end of the 17/64" bit through the drilled holes to keep the longer pieces aligned. Tightly clamp the sandwiched pieces together, make sure the long and bottom edges are flat and square against a flat (preferably machined) surface. Wipe away any excess glue. Allow the glue to dry before removing the clamps.
4. With the wood now secured, mount the dial indicator to the hole using the bolt, washers, and locknut.
5. Position a spare wheel onto the 3/32" drill bit with the point toward the wood. Center the drill bit on the short wood piece and move the bit toward the dial indicator arm, compressing the dial indicator arm with the tread of the wheel. When the dial approximately points to the 12 o'clock position, bear down on the drill bit to make a mark on the wood. (We use 12 o'clock so the kids won’t have to read the numbers upside down when they zero the dial.)
6. Drill a 3/32" hole perpendicular to the edge of the wood at the marked location, deep enough to completely cover the fluting of the drill bit. (Use a squared drill press and a fence for this step, if available, watching out for the bit coming through the opposite edge.)
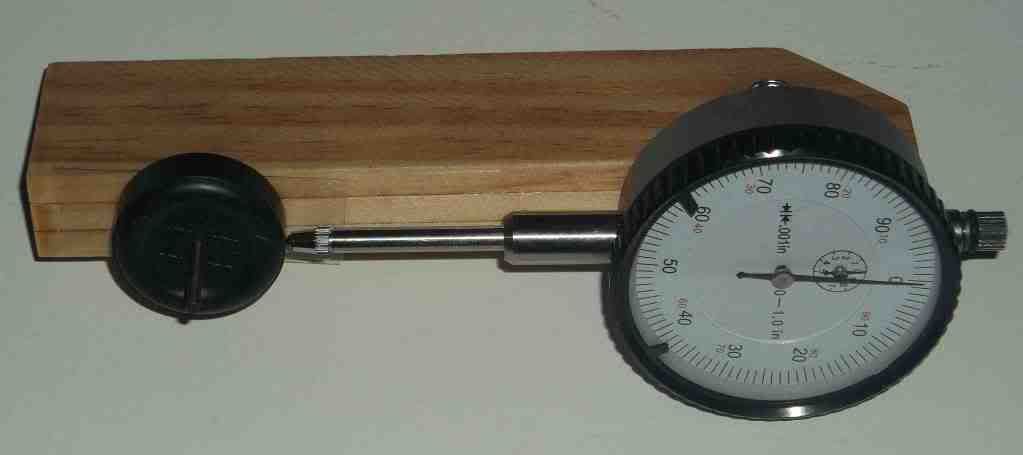
7. Sand all edges flat. Insert a 3/32" drill bit into the hole, deep enough to cover the fluting. Optional: Trim off excess wood behind the dial at a diagonal and trim up the bottom edge.

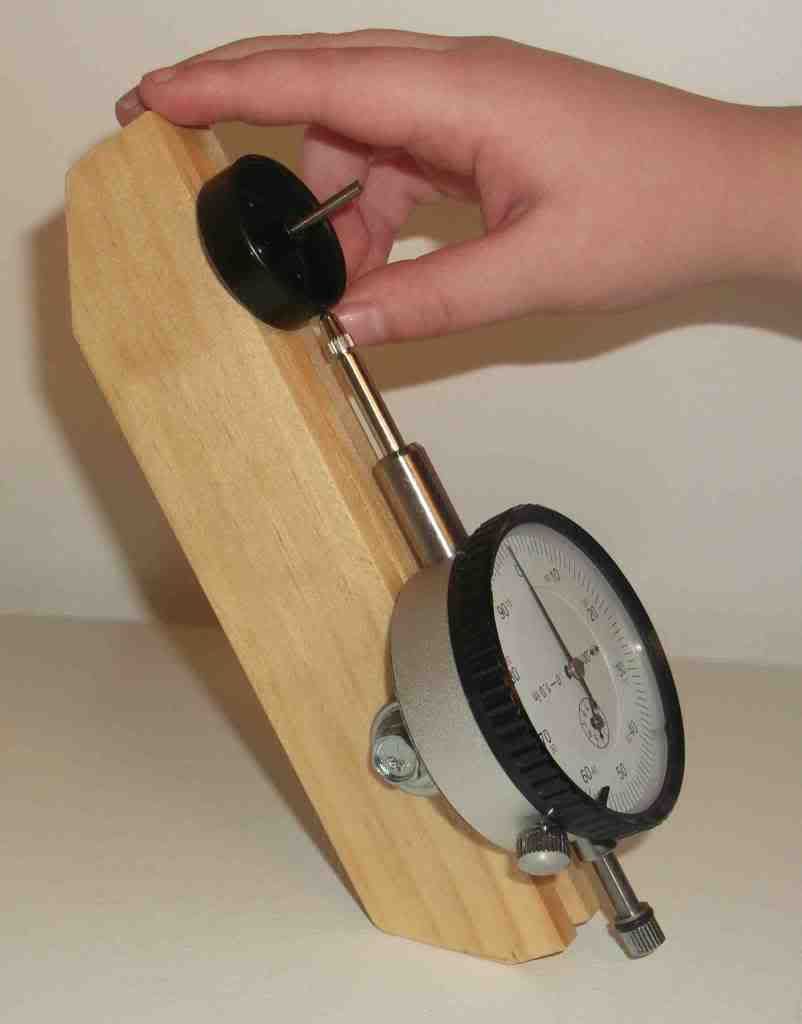
Here it is in action. Although a 3/32" bit sounds a bit loose, we like the fact that the wheel spins freely and comes on and off easily, and the slight pressure of the indicator arm hold the wheel sufficiently against the bit such that we’ve never felt the need to upgrade to a larger diameter pin gauge. When turning the wheel, applying pressure from the top (as in the photo) minimizes play in the readings.
Another "upgrade" barely visible in the photo was the addition of some very thin plastic as a backing for where the wheel rides on the wood (cut from a piece of blister-pack packaging about to go into the garbage). This was not really necessary though.
[Edits: Removed embedded link to a commercial site and link to a later inverted, upright version. Added link to #41 drill bit recommendation.]